Monday, October 11, 2010
Chocolate Cupcakes with Swiss Meringue Buttercream
The Swiss Meringue Buttercream? It is rich. Very rich. The first day I thought, "This is too much butter, even for me." But I tried the frosting the next day and liked it so much better. So if you want some really pretty really rich frosting, this recipe is for you.
Let's see. Why did I make this recipe? We had some fresh mint, and I wanted to use it in cupcakes. I tried to make the frosting by steeping the mint when with the eggs. Guess what? It didn't work. I tried whipping the egg whites for 30 minutes and they would not get stiff, so I had to start over. And by that time, I didn't want mint anymore, so I ended up using almond extract.
The cupcakes are a favorite standby, the base from black bottom cupcakes.
The frosting is a version from Martha Stewart's Cupcakes. I only made a quarter batch, it frosted about 12 cupcakes.
Ingredients
3 egg whites
3/4 cup granulated sugar
1 cup (225 grams) unsalted butter, room temperature
pinch of salt
1/2 teaspoon almond extract
1/2 teaspoon vanilla extract
Put the sugar and egg whites in a bowl that can handle heat (I used the bowl of the Kitchenaid Mixer.) Put the bowl over a pan of simmering water, and stir until sugar has dissolved and egg whites are hot to the touch, about 3 minutes. (I used a candy thermometer and heated the eggs and sugar to 150 degrees F. This is where I tried using fresh mint and it did not work!)
Remove the mixture from the heat, add the salt and beat the egg whites until they form stiff and glossy peaks, about 10-15 minutes.
Sunday, September 26, 2010
Sour Cream Chocolate Cupcakes
We had a lot of sour cream in the fridge. It was either use it or throw it away. And if I'm ever going to lose weight I'm going to have to stop baking. But not today. Instead I used the recipe from Cookie Madness for Sour Cream Chocolate Layer Cake. I halved it and made cupcakes.
The link is here. These are some good, dense, chocolate cupcakes.
Niall's mom sent me some fancy frosting tips, so I'm giving them a go.
Wednesday, September 15, 2010
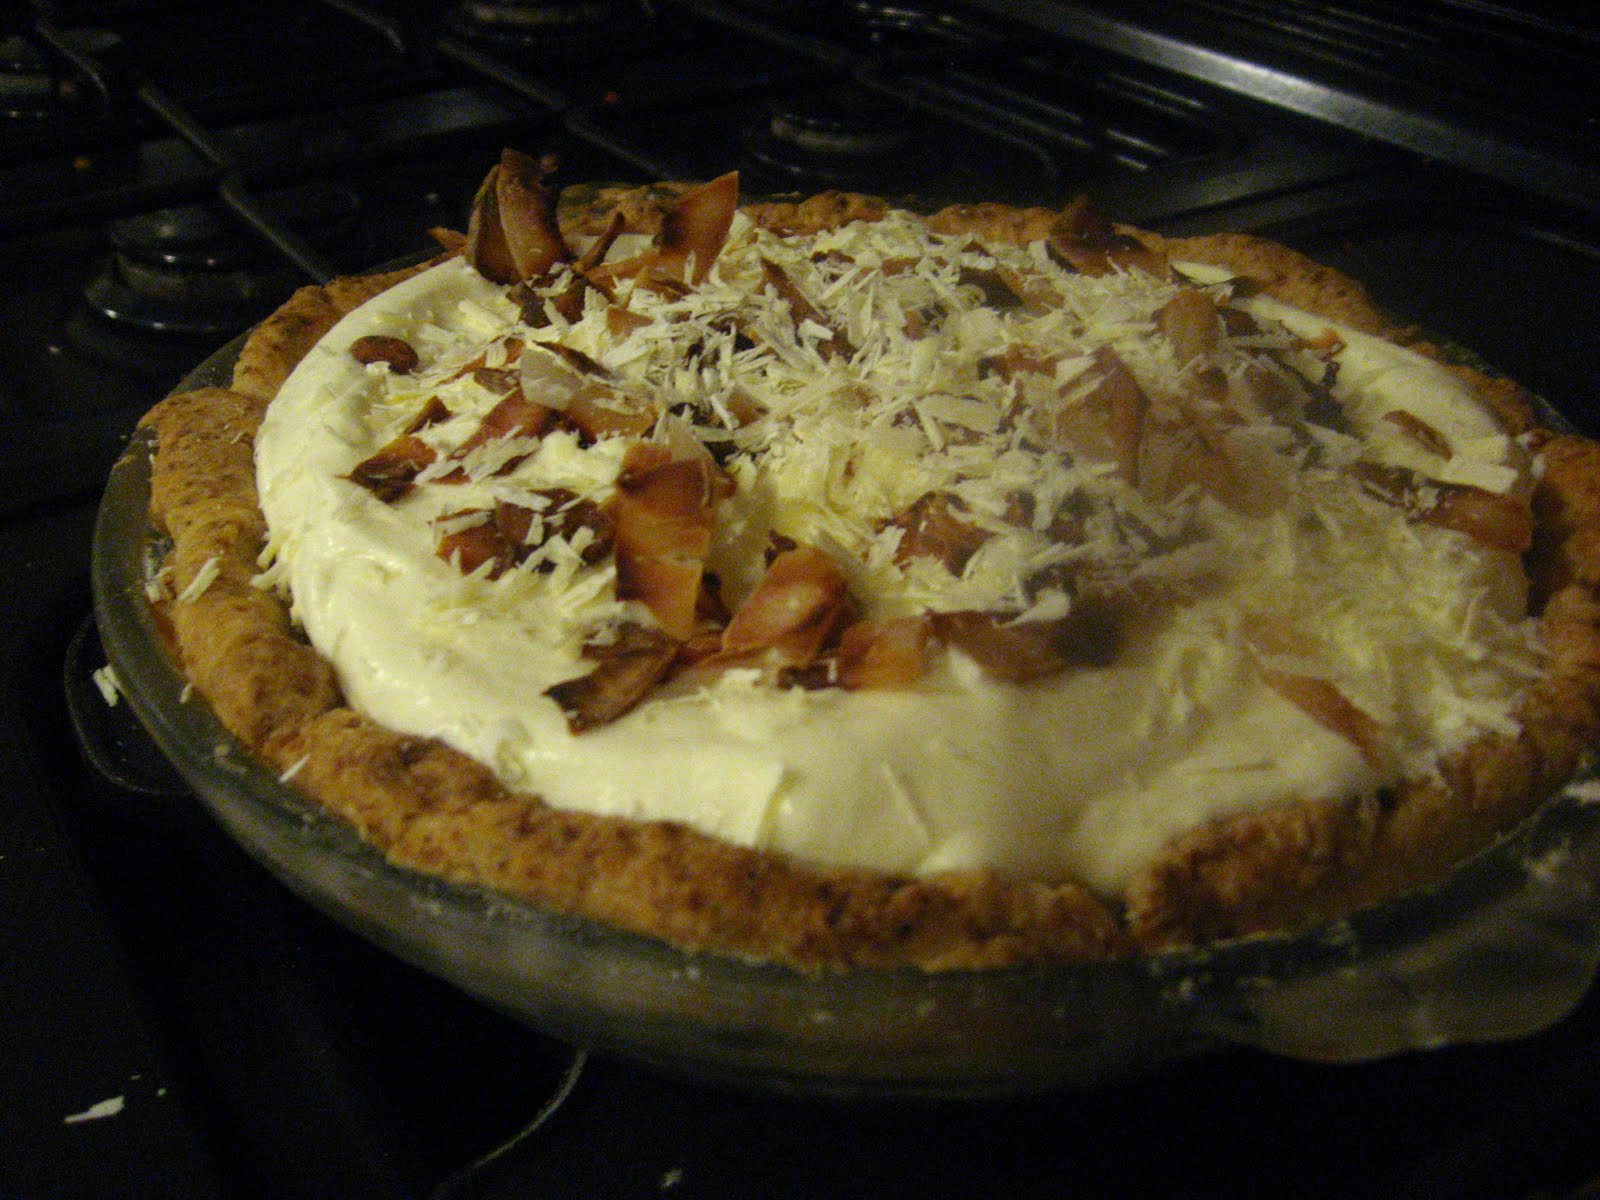
Triple Coconut Cream Pie
I bought some coconuts for props (because we're making a little video for church based on "Jungle Book".) A friend is coming for dinner and said we should have the coconuts. I've never used fresh coconut before, but decided to give it a try. We have a lot of whipping cream in the fridge, so I decided to try this recipe from the Dahlie Bakery in Seattle. I used the link from Family Friendly Food for the recipe. (Clink the link for the details.)
I found this video was so helpful. Since moving to the UK my grandma's never fail pie crust recipe hasn't worked so well. I'm always on the lookout for how to make a decent pie crust and the video gave some great tips. (Mainly to have everything, including the pie plate, very cold.)
The pie was good and rich. But I made the crust a bit too thick!
I thought I rolled the pie dough thin enough but in hindsight I wish I would have gone thinner.
And the tip about tucking the crust under around the top made it looked pretty.
Blind baked the crust, then made the coconut custard.
Cooled the custard and then poured it in the crust.
It took me ages to open the coconut. I tried draining the coconut water. Then a hammer. Finally I just banged it against the cement step outside. I cooked the coconut for about 20 minutes at 400 degrees, which helped to peel it. But it was still difficult to shave.
Then I browned the coconut.
Whipped the cream and then topped with the shaved coconut and shaved white chocolate.
I found this video was so helpful. Since moving to the UK my grandma's never fail pie crust recipe hasn't worked so well. I'm always on the lookout for how to make a decent pie crust and the video gave some great tips. (Mainly to have everything, including the pie plate, very cold.)
The pie was good and rich. But I made the crust a bit too thick!
I thought I rolled the pie dough thin enough but in hindsight I wish I would have gone thinner.
And the tip about tucking the crust under around the top made it looked pretty.
Blind baked the crust, then made the coconut custard.
Cooled the custard and then poured it in the crust.
It took me ages to open the coconut. I tried draining the coconut water. Then a hammer. Finally I just banged it against the cement step outside. I cooked the coconut for about 20 minutes at 400 degrees, which helped to peel it. But it was still difficult to shave.
Then I browned the coconut.
Whipped the cream and then topped with the shaved coconut and shaved white chocolate.
Tuesday, September 14, 2010
Nursing Chair
It's not a recipe, but since someone asked, here's something I made. We bought this chair at the charity shop. I really wanted somewhere to sit to nurse the baby that had a high back and arms. I loved the shape of this chair but knew it needed some work. Now that the baby is moving onto solid food, I finally got around to fixing it.
Supplies
Piece of glass (from a broken bottle)
Sandpaper (4 A4 pieces of 60 grit)
Wood stain (Teak colored)
Danish Wood Oil
Screwdriver and pliers (to remove fabric staples)
Rags (to apply stain and oil)
Staple gun and staples
3 1/2 yards of upholstery fabric
Thread, straight pins and sewing machine
Scissors
Needle and string (to sew on buttons)
3 buttons/button cover kit
Initially I just thought we'd reupholster the chair. However, the arms were worn so I realized I need to work on the wood as well.
I really liked the dark finish, but didn't feel like I could only redo the arms and have them match the rest of the chair. So I decided to strip the chair back and start from there. I didn't want to use a chemical stripper. A guy at the hardware store suggested a piece of glass, so I broke a bottle and took and used a broken piece that was about three inches long. It was fantastic. I used the glass to strip off as much of the finish as I could (I thought it might scrape the wood, but it only scraped up the lacquer), then I used sandpaper to smooth off the wood.
To remove the upholstery I used pliers and a screwdriver to pry out the staples. I really should have used a specialized tool. The inside of the chair is stuffed with springs and burlap (jute). I didn't want to have to restring the springs so I left part of the old fabric attached. Here's the stripped back chair.
The Eco Centre down the street suggested a water based teak stain. I applied four coats with a rag, letting each coat dry for about an hour. I really liked the water based stain because it did not smell. I would have liked the wood a little darker, but the stain was starting to build up and I didn't want the finish to be too tacky.
I used a rag to apply the Danish oil as a seal. I did two coats, letting the first coat dry eight hours and the second I left overnight.
I sewed a new cushion cover (reusing the zipper and stuffing from the old one) and reupholstered the chair, using a staple gun to apply the new fabric. I tried using regular staples. But the wood was quite hard, so I switched to heavy duty staples and it made all the difference. I didn't quite make the fabric tight enough in a few places, but here it is.
I covered three buttons and sewed them into the chair back and then put on the back fabric. We might have been better off buying a new chair. (The entire project cost about 100 GBP. Chair-35, Fabric-50, Supplies-15.) It isn't perfect, but I think overall we're pretty happy with it. Niall sat in it last night without complaining.
Supplies
Piece of glass (from a broken bottle)
Sandpaper (4 A4 pieces of 60 grit)
Wood stain (Teak colored)
Danish Wood Oil
Screwdriver and pliers (to remove fabric staples)
Rags (to apply stain and oil)
Staple gun and staples
3 1/2 yards of upholstery fabric
Thread, straight pins and sewing machine
Scissors
Needle and string (to sew on buttons)
3 buttons/button cover kit
Initially I just thought we'd reupholster the chair. However, the arms were worn so I realized I need to work on the wood as well.
I really liked the dark finish, but didn't feel like I could only redo the arms and have them match the rest of the chair. So I decided to strip the chair back and start from there. I didn't want to use a chemical stripper. A guy at the hardware store suggested a piece of glass, so I broke a bottle and took and used a broken piece that was about three inches long. It was fantastic. I used the glass to strip off as much of the finish as I could (I thought it might scrape the wood, but it only scraped up the lacquer), then I used sandpaper to smooth off the wood.
To remove the upholstery I used pliers and a screwdriver to pry out the staples. I really should have used a specialized tool. The inside of the chair is stuffed with springs and burlap (jute). I didn't want to have to restring the springs so I left part of the old fabric attached. Here's the stripped back chair.
The Eco Centre down the street suggested a water based teak stain. I applied four coats with a rag, letting each coat dry for about an hour. I really liked the water based stain because it did not smell. I would have liked the wood a little darker, but the stain was starting to build up and I didn't want the finish to be too tacky.
I used a rag to apply the Danish oil as a seal. I did two coats, letting the first coat dry eight hours and the second I left overnight.
I sewed a new cushion cover (reusing the zipper and stuffing from the old one) and reupholstered the chair, using a staple gun to apply the new fabric. I tried using regular staples. But the wood was quite hard, so I switched to heavy duty staples and it made all the difference. I didn't quite make the fabric tight enough in a few places, but here it is.
I covered three buttons and sewed them into the chair back and then put on the back fabric. We might have been better off buying a new chair. (The entire project cost about 100 GBP. Chair-35, Fabric-50, Supplies-15.) It isn't perfect, but I think overall we're pretty happy with it. Niall sat in it last night without complaining.
Sunday, September 12, 2010
Momofuku Cereal Milk with Chocolate-Hazelnut Thing (vegetarian vesion)
So, you know I'm not a great photographer, right? Sorry about the shadows.
Anyway, I've never made panna cotta before, so this was fun. I don't think I've ever even had panna cotta. I modified the Momofuku recipe a little to make this dessert suitable for Niall.
To make the Cereal Milk vegetarian I used agar flakes instead of gelatin. I halved the recipe (and also used 2% milk instead of whole) and after straining the cornflakes I had almost two cups of liquid. I poured the liquid into a pot, added the brown sugar and salt, and sprinkled two heaping tablespoons of agar flakes on top. I heated the liquid on the lowest heat possible without stirring. Once the liquid was piping hot (but not boiling) I stirred in the agar flakes and continued stirring until they dissolved. Then I poured the milk into the molds.
Niall (who has had panna cotta) said this was a little stiff. It may be because of the agar but most likely it's because of who was making it. Maybe the tablespoons shouldn't have been quite so heaping. Overall, this was pretty good. Niall probably liked it more than me because I'm not a fan of hazelnuts. The Cereal Milk on its own tasted like milk and cereal. But adding the chocolate-hazelnut thing with the caramelized corn flakes added sweetness and salt.
The chocolate-hazelnut thing has a praline paste, which is roasted hazelnuts with caramelized sugar. I poured the caramel into the blender with the nuts and almost broke the blender. (The sugar hardened right away and stuck to the sides. Luckily Niall got it fixed and cleaned.) Once we had the paste, I mixed sugar, powdered milk, salt, butter and cornflakes and then baked them in the oven. Then mixed together the bittersweet (okay, half semi-sweet half baking chocolate) with the praline paste and other ingredients. The book calls for gianduja, but I cheated and just used Nutella. I spread the mix on waxed paper and topped with the caramelized cornflakes. I didn't do it fast enough and the cornflakes didn't stick.
I put it in the freezer. After it was cold, I broke it into pieces and sprinkled it on top of the panna cotta, which had been removed from the mold. You're supposed to make an avocado puree as well, but I didn't. We still have half of this left (it's in the freezer) so maybe next time I'll add the avocado.
Momofuku Sour Cream Ice Cream with Miso Butterscotch
Ice cream made from sour cream had me just a bit skeptical. But it was delicious. It reminded me of lime ice cream we used to have when I lived in Farmington, Utah. Niall said the recipe may be in competition with my mom's strawberry ice cream. (The strawberry recipe is Niall's favorite homemade ice cream.)
Sugar dissolved in water, sour cream, lime zest, lime juice, sour cream and an ice cream maker. So simple and so good.
The miso butterscotch I didn't try because it has uncooked alcohol in it. But Niall said it was tasty, it made it seem like there was a biscuit (cookie) with the ice cream. The shiro (white) miso is baked almost to the point of being burnt, then pureed with equal parts brown sugar, slightly less mirin (that's where the alcohol comes in), some butter and a splash of sherry vinegar. We have plenty left over if you want any.
Saturday, September 11, 2010
Momofuku English Muffins
I live in the UK. And you know what I miss? English muffins. Niall has just informed me that they're in all the shops, only they're just called muffins. But I've lived here for 3 1/2 years and go to the store all the time and do NOT recall seeing them. So, maybe English muffins are all over the place, but I was really excited to make these because I haven't had them in ages.
How amazing are the dough recipes in the Momofuku cookbook? Seriously, the directions are so good for making dough. The steamed buns recipe made a very stiff dough. This recipe was one of the stickier doughs I've made. It wasn't easy to work with, but was manageable. And the dough really was pillowy and tender and delicate.
The muffins I made weren't symmetrical. But I was so proud of them! I had never griddle baked dough before.
We were supposed to make Bay Leaf Butter, but didn't get around to it. I froze more than half the dough and will make these later with the butter. Once the muffins are made, the cookbook suggested searing the muffins in a hot griddle, which I tried. But truth be told, we liked them better from the toaster.
Subscribe to:
Posts (Atom)