Tuesday, November 5, 2013

Monochromatic Portrait

Once upon a time I used to paint things other than walls and furniture.  Things like canvas, with oils.  But the mess and the time means that kind of painting is on hold.

Except for when Niall asks for a picture of one of the kids for his birthday.  I love painting, but seem to stress out over the painting and getting the colors right.  To counter the stress, I eliminate the color element.  And just use one tube of color and one tube of white oil paint.

There are four basic steps.  

1.  Take a photo.  The more contrast and better the lighting, the better.


2.  Draw, sketch, or in this case trace (with a projector) the picture onto a canvas.  I also adjusted the photo, upping the exposure and shadow and printing it out in black and white.  (Or black and pink, since we're out of white paper.)  The main thing is to get the different shapes the shadows make.


3.  Set up a palette with a spectrum of tints and shades from darkest to lightest.  Then start painting the darkest shadows, slowly working to the lightest until there's only white left.


4.  Keep working on the painting until it's finished.  Or, as is the case with pretty much every picture I've ever painted, finished enough.


I did manage to keep the painting a secret for weeks.  But slowly I slipped up the surprise.  (Come on, finding time when Niall wasn't around and the girls were sleeping was pretty rare.)  First I left out the mineral spirits.  Then one night it was the paint brushes.  And a few days before his birthday, he left the house and walked in on me pretty much finishing the picture.

Guess what?  We got planning permission yesterday for a loft conversion.  Hoping to start it before the end of this month.  More later.

Sunday, August 25, 2013

Converting the Bomb Shelter (Air Raid Shelter)

When we first saw the house, we thought there might be an outbuilding under all the overgrowth in the backyard.  After talking to the neighbors, we found out there was a genuine WWII concrete bomb shelter.  (Though they keep telling me it's called an air raid shelter.)  This isn't an 
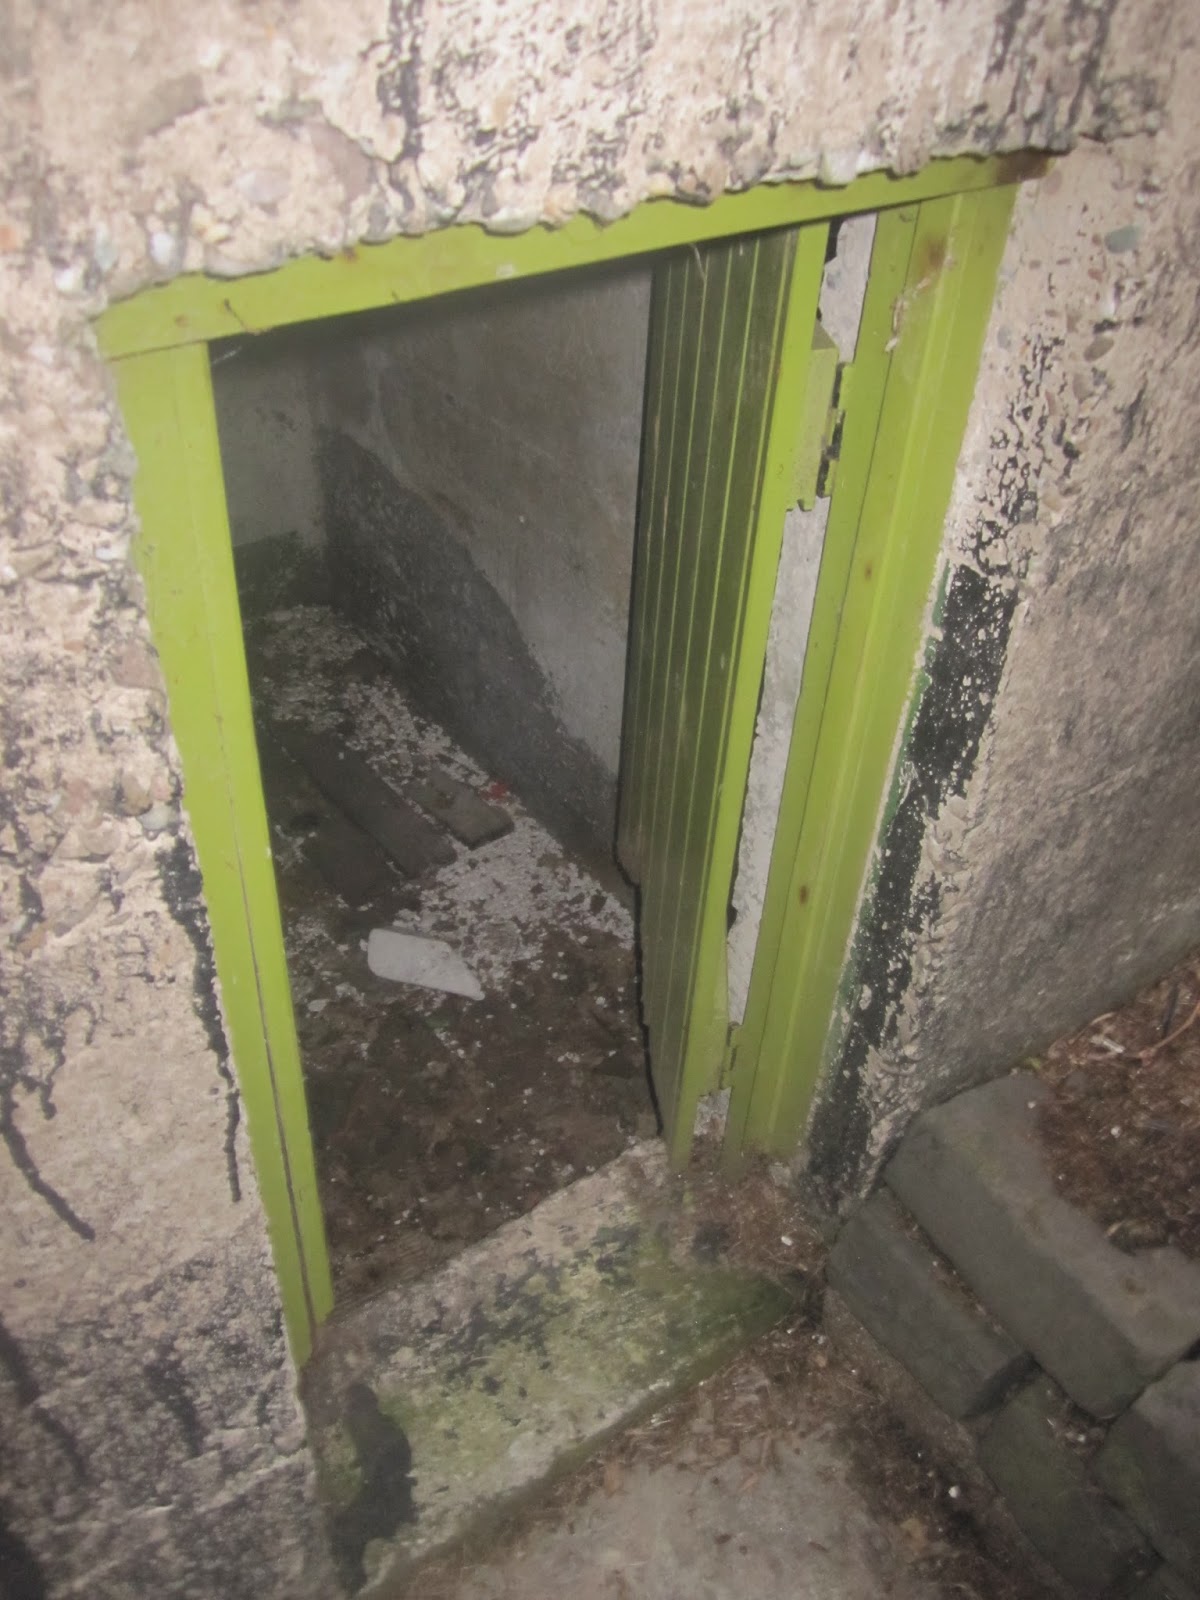
Anderson shelter, it is a full-on concrete bomb shelter with a baffle wall.  Here's a photo of what it looked like when we finally made it through the overgrown back garden and got a semi-proper look.


Since the focus has been on the house, it has taken a while to get around to the bomb shelter.  We initially cleared out all the junk (there was a rusted car door among loads of other pieces of useless junk!  But I did save a sewing box crate.  More on that later.)  The post has been a long time coming and is rather long, so sorry for the ramble!

Clean-Up

I started a massive clean-up project of removing overgrowth, about a ton a rubble and a wasp nest from around the shelter.  It was physically demanding work (and a little scary) but finally got the area cleared.


That's when I started looking inside the bomb shelter.  We'd talked about doing something to the shelter down the road...like making it a super small/weird man cave.  Or kitting it out to be as-authentic-as-possible to what it would have been like in the 1940's.  At any rate, Niall and I both see it as a kind of amazing piece of history, so we didn't want to remove it or change it structurally.

Our electrician surprised us by putting in a light and a plug.  And I started to think it was kind of a shame that the bomb shelter was sitting empty.  I realized it's actually a pretty sturdy little building, despite the floor being disgusting.


The door (I kind of think it's adorable) rotting away.  There were all sorts of bugs living inside and a few frogs.


New Floor and Paint

I cleared out all the rubbish, swept, vacuumed, swept again, scrubbed with bleach, and ended up with this.


Since the shelter's concrete floor is laid directly into the dirt there is rising damp.  I did a lot of research and talked to as many folks as I could think of to find a solution.  Our go-to builders are all tied up with jobs, and I we wanted to keep costs down.

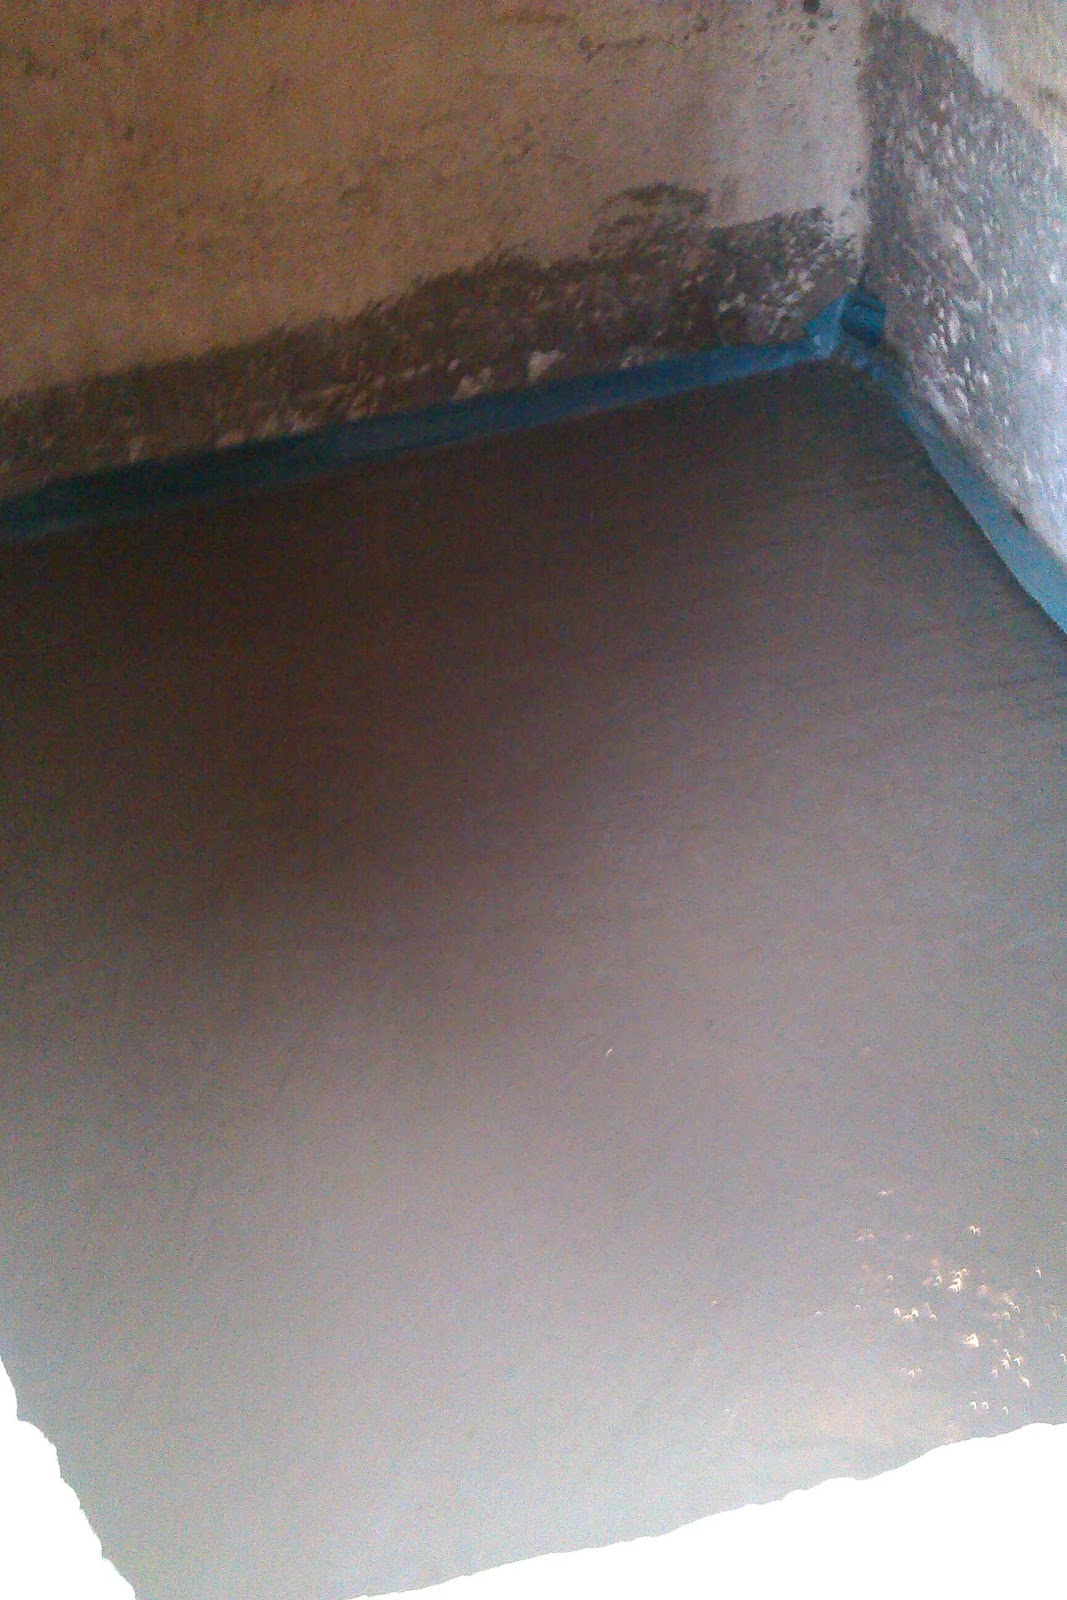
Long story short, we ended up renting a cement mixer and getting a quarter ton of concrete (four bags aggregate, four bags sand and one bag of cement.)  I laid down in a damp proof membrane and then did my best to mix up a cement floor.  (We were going for a 55mm thick slab, as I'd read that's what we'd need for this type of project.) 


I am a concrete know-nothing, so I called my brother for some help.  And talked to a few guys at the building yard.  And watched a lot of youtube videos.  I poured the floor, leveled it with a long board and level, and then used a trowel to smooth.  My brother had told me about 'cream' that rises when cement is laid.  I loved that tip; when I initially poured the concrete it was a rocky mess.  But, sure enough, the cream made its way to the top so I could smooth the grey liquid over the rocks. The floor ended up okay-ish.  I was actually quite proud that we managed to get it in, and get the yard cleaned up from the massive cement making mess!


Painting inside was a bit of a trick.  I called several paint companies to see what they recommended using to paint a 70-year old concrete cell.  Several told me they didn't make anything suitable.  Dulux recommended their cellar paint, primed with a few mist coats of vinyl matt.  The cellar paint is about £80/tin.  So instead, I got a can of mis-tint vinyl matt and a mis-tint can of their exterior masonry paint.  I love mis-tints.  It was £15 for both.  The colors weren't exactly what I wanted (ie. white) but since they were about £90 less than what I'd pay retail, I decided it was okay.  The masonry color looked grey outside but light brown in the bomb shelter.

The area isn't big, but we used almost 20 litres of paint (and that's with two coats of the vinyl watered down.)  I say 'we' because a certain three-year old was very keen to help.  And help she did!  The concrete was almost like a sponge and took so much paint!  (You can see the newly-poured floor below.)


We ordered some yellow vinyl flooring.  And since it looked so rough around the edges, I put in some skirting.  Since the walls aren't flush, neither is the skirting.  And I'm going to have to do some touch-up and fill the gaps.  But it will do for now.  Hopefully the damp proof layer and paint will work against the elements.  Check back in a few years!


Door

The trusty green wooden door, as I mentioned previously, was rotting.  Not just the door, but also the frame.  The structure is fairly similar to a gate, and since I made one of those I thought I could handle a smaller version.  But as we talked about it, we realized having a door with glass would really help to lighten things up.


For weeks and weeks I looked for a used wooden door with glass (or glazed) that we could cut down to size.  I'll spare you the details, but let's just say that I looked a lot of places and no luck.  

One day the girls and I drove out to Yooz (it's kind of like Restore, a big charity that recycles building materials) and found some wooden window that I thought maybe would work.  As luck would have it, they were giving wooden windows away on the day we were there, so they were free!  Our joiner is also completely booked, but he talked me through some basics on how to make a door myself.


I removed the fixings and used the Kreg Jig to attach an extra piece of wood.


Then I drilled some holes and chiseled (poorly!) a space to put in a tumbler latch.


And put in a new frame, then attached the door and painted it.


We had a few spare door knobs that I put on the new window/door.


Ha!  The one year old it pleased with her new play area.  We cleaned it again and scraped the paint from the window.


Glue is so tempting!


We got a little step stool from Ikea since there's a drop from the door to the ground.  The door has gaps, the skirting has gaps...things aren't perfect.  But they're good enough for now.


So just for a quick recap...here's what it used to look like.


Hopefully the girls will find the bomb shelter a fun play area...and maybe in time Niall will get his man cave after all!

Cost Break Down-

Concrete Mixer/Concrete/DPM:  £71
Paint:  £15
Vinyl Floor:  £21
Door hinges/hardware/wood:  £28
Skirting/Adhesive:  £14
Total:  £149

Sunday, July 28, 2013

I Made a Gate!

The side of the house has kind of been in limbo.  We want to build an extension there in time, so we're loathe to invest too much in improvements.  However, the gate was an eyesore.  Some friends stopped by our house (they had been here when the renovation started) and told me they only way they could recognize the house was by the gate!  I know it was meant as a compliment, but I took it as a challenge.  The only picture I can find of the gate before is this one.


The old gate and one of the posts were rotten.  We started looking around for new gates and the narrow size meant we had to get one custom made.  The best quote we got was £140.  I thought that was a bit steep and on a Sunday evening I told Niall I thought I could build one.

On Monday morning, I was at Jewsons and there just happened to be some offcuts of wood that were the exact height we needed for the gate.  I took it as a sign and bought the wood.  Our joiner was on site (making George in the kitchen island) and gave me some guidance (and helped wench the pieces together.)  It was a niggly operation.  At one point I had my mom and our three year old holding pieces together.  It was a three-generation job!

Pretty soon we had this.  (If you looks to the left, you can see another shot of the old gate.)


The title of the post is a bit misleading.  I didn't make the gate all by myself.  Our joiner ripped both sides of the gate with a saw so it was just the right size.

Then I started sanding.  And then priming.  Only to find that I hadn't rinsed our roller very well. 


Then I did the rest.  Primed again.  Sanded.  Painted with gloss paint.  I then ripped, pulled, used a crow bar,  kicked and a few other tricks to get the old gate and post removed.   Replaced a gate post, and hung the gate.  Apparently I didn't take very good after pictures either.  But, anyway, we have a new gate!  Here's the view from the back door (along the side of the garage, heading out towards the front of the house and the street.)


The gate matches the front door.  (We have a lot of that gloss paint left.  I think I'll use it to paint a few more outside doors.  Like on the coal shed and possibly the bomb shelter.)


We sanded, primed and painted the wooden surround on the garage as well.

The original lock I put on the gate wasn't strong enough.  It has taken a few weeks, but I finally got around to beefing it up and moving the placement to make it stronger.  Gate is 'secure', and maybe some day I'll get around to painting the new pieces.  Or maybe not.

Saturday, July 27, 2013

Painting the Fence

Even though the house was in pretty awful shape when we bought it, I feel like we inherited some nice things.  Especially in the garden.  Despite needing to have the entire plot cleared and lawn laid, we did inherit some mature trees, a bomb shelter and a very sturdy fence.


We share a fence with neighbors on three sides.  One neighbor had painted theirs red, one has theirs painted green and one has their fence in the same state as ours.  (They have a lot of bushes in front of the fence, so no real need to paint it.)  To match with at least one of the neighbors, we had a choice between green and red cedar.  We had some cedar red fence paint that the previous owner left behind.  But neither of us were that keen on it.  I sold the red fence paint and picked up a 20-litre bucket of Ronseal One Coat Fencelife in Forest Green.  Looking back at photos, it's fairly apparent that the fence needs some TLC.  


The paint has been sitting in the garage for about a month, but I finally decided we just needed to get started.  One night I wire brushed the fence that holds the garbage cans (bins).  Then I painted it (with a large brush).  Two coats and it looked like this.


Wire brushing the fence worked well, but took a lot of effort. The next morning we used the pressure washer to clean off a large portion of the fence, and let it dry all day.   The pressure washer did the trick to clear off the moss and grime. That evening (once the kids were in bed) Niall and I headed out and painted a long stretch.


A few more sessions of pressure washing and painting and two sides of the fence were done.


The side where the neighbors have a green fence as well looks really good.  The side with the cedar red looks a little odd when you look closely.  Because of the slats, we couldn't really paint everything green because it would make the neighbors side look ridiculous.  So we tried our best to paint 'our' side of the fence without causing problems for the neighbors.  And the end result is a hodgepodge.  (We kept trying to look over the fence to make sure we weren't dripping paint on the wrong side.)


The back fence took a lot longer.  The large amount of vegetation, wood, rubble and weeds made it difficult to clean or paint.  It took several rounds of clearing and runs to the dump before we could work on the back fence.


 The baby didn't mind if I power washed as long as I held her while I did it.


Finally!  We had clear access to the fence, it was clean and dry.


I cleared most of the rubble, but kept behind these stones.  I think we may be able to find a place to put the stones rather than take them to the dump. 


The fence is almost finished.  We ran out of paint today, and there's still one more panel that needs to be painted.  But you can't really tell from this photo.


Still lots to do in the garden (and it's not like I know how to garden, but we're learning).  Tonight I'm pretty happy the garden looks like this.


Friday, July 12, 2013

Better Than She Found It

My mom has been visiting from the US for six glorious weeks and went home yesterday.  I asked her what she wanted to do for her last day and she said she wanted to clean our bathrooms!  (They're not disgusting or anything, just need the weekly clean.)

She told me it was important to her to leave our house better than she found it.

I started to think about how much things have changed at our house in the past six weeks, and had to laugh at my mom wanting to clean the bathrooms.  She has already done so much!

Sanded and vanished all of nine of the window surrounds.


She helped us get all of the pictures framed/hung.


She did all sorts of sewing...


Including these giant floor cushions for the kids.


Helped me build a gate.  (More on that later.)


Helped with the garden (including gently encouraging us to get a trimmer for the edges.)


Spent ages helping me find a new living room set that was in our budget:


Cooked, cleaned, watched the kids and all sorts of other things so we could get the house unpacked and organized.


And probably many more things I forgot.  Like cleaning the bathrooms would make a difference after everything else.  But she cleaned them anyway.  Thanks, Mom!

Don't worry, we gave her a little bit of time off for good behavior.  (She finally made it to Wimbledon!)