Saturday, December 19, 2015

Side Extension: Ground Works Week 1

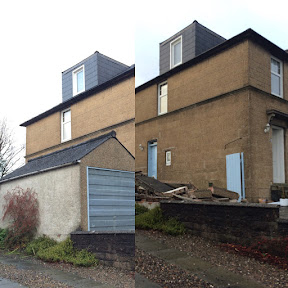
As a reminder, we're in the process of building a single storey side extension off our house.  We had the garage demolished, and this week the ground works started.

When we first started talking about getting an extension, Niall sent me a link to a blog called Ten Square Metres.  Being a novice to building works in the UK, I found it fascinating.  It gave me some insight into what would be required.  In that build, a lot of it was DIY and took maybe a couple of years.  It gave me the idea that perhaps I could dig the foundations for our house myself.  


I honestly thought if I just dug a few hours a day, I could save us some ££.  But then I dug a 1 metre cubed hole (as a trial pit) for the structural engineer and decided that we'd pay for someone else to do the digging.  (It was hard!)   This is a photo of the trial hole, at a depth of about 83 cm.


The trial pit showed that the original house foundations were about a metre down, which meant the new foundations needed to be even deeper.  The ground works crew showed up on Tuesday and spent most of the day digging by hand to uncover the water and drain pipes.  On Wednesday, I spoke with Building Control, the builders and the structural engineer and they decided on a plan of action.  (Dig a new trench, divert the pipe and put in an access hatch.)


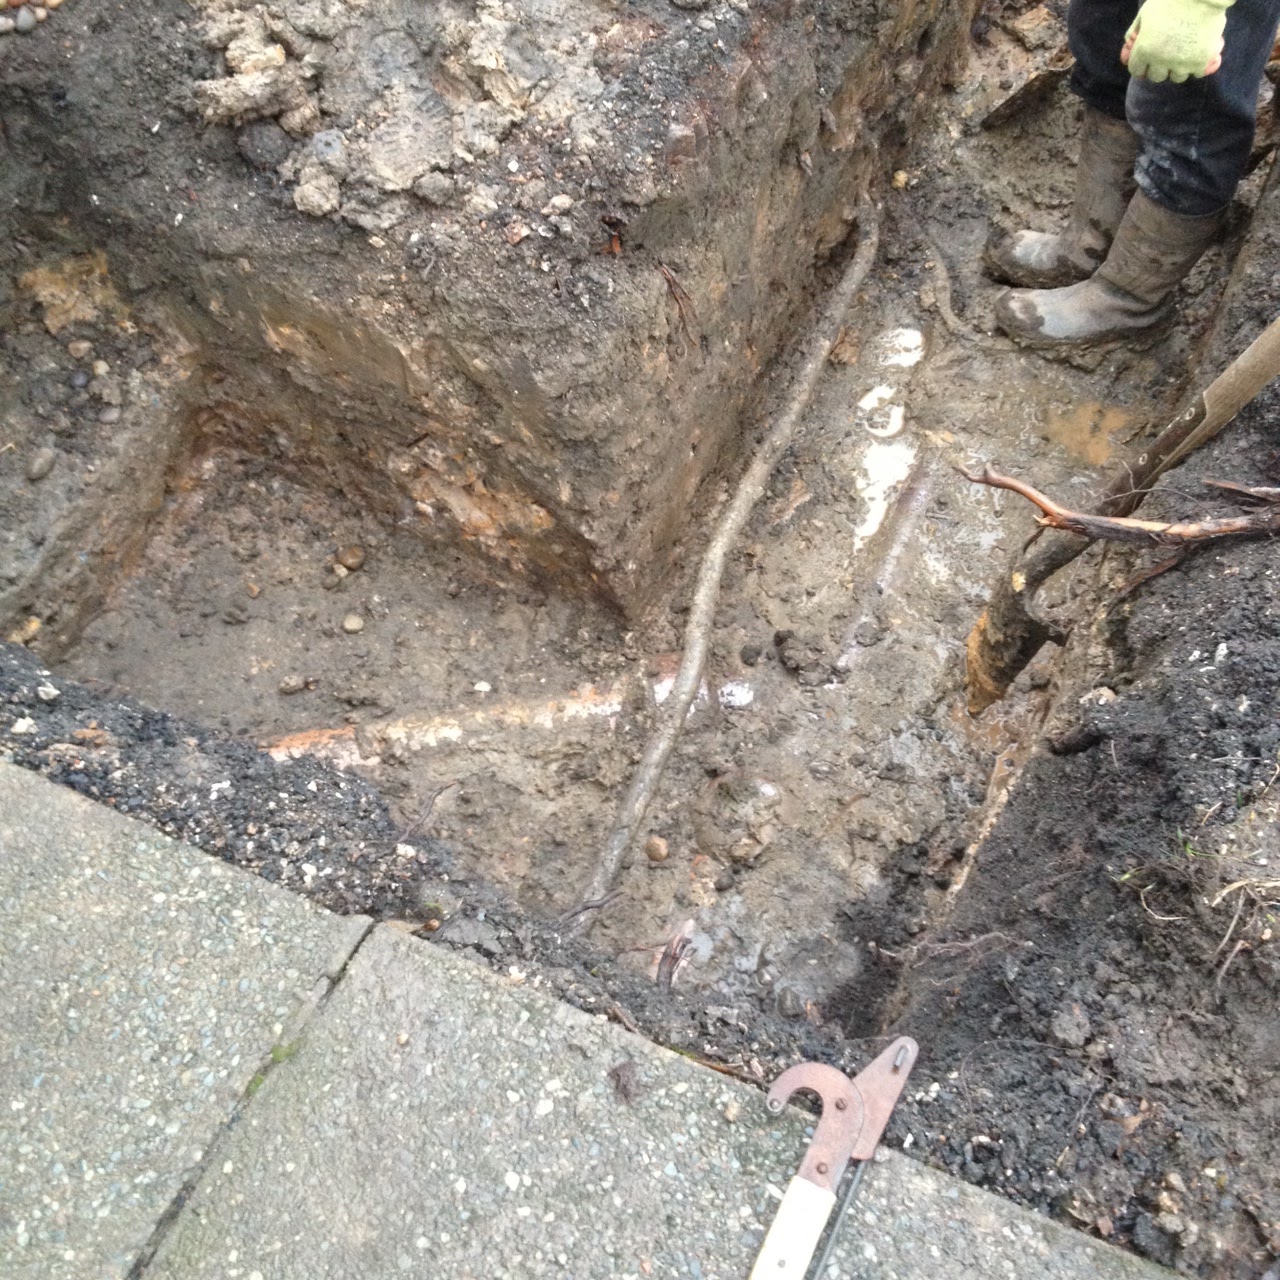
With the pipe unearthed, the rest of the foundation work went a lot faster.  The guys got most of the foundations dug on Wednesday and finished on Thursday.  JCB's make work go such much faster!
  

One thing I continue to miscalculate is the amount (and cost of removing) of unwanted debris.  


There was so much soil that it would have taken two regular skips (dumpsters) that fit in our drive or a large one, that would not have fit on our drive.   A street permit can take up to a week from Glasgow Council, so the soil piled up in our drive and then a truck with a grabber hauled it all away.


And we were left with a moat around the side of our house.


The guys filled it in with Level 1 Hardcore.  (This will be a bit of a photo dump.  Glasgow Council is understaffed at the best of times, but given its almost Christmas and they had a technical mishap this week, there was no chance of getting an inspector, so we'll be relying on photographic evidence if required when it comes time for getting the building certificate.)


And then they put in the steel to reinforce the concrete.


After the New Year, they'll come back and dig out the new runs for the pipes, so for now the section with the pipework is not getting filled in with concrete and aggregate until later.


Today (Friday) the premixed concrete showed up.  The guys wheeled it and poured it into the foundations.  It was a source of entertainment!


The guys were so fast with their wheelbarrows.  There were three running back and forth (I assume they didn't shoot it in due to distance or cost?)  Pretty soon the concrete was up to the right level.


So now the foundations are poured, they're 'covered' and they going to cure over the next two weeks, until after the holidays.


My understanding is the Ground Works team will come in and dig the new run for the pipework and the bricklayer is going to come in and build up brickwork to ground level.

Sunday, November 29, 2015

Bye Bye Garage

Ahh!  It has been so long coming, but last week the demolition team showed up and has done some major destruction.  Which I call progress!

In the back garden, we has some self-planting sycamore trees that needed to go before they got too big.  Plus some apple trees that no longer bear fruit.  And loads of tree trunks left from the first garden clear-our.  (We left the trunks, knowing we'd have a digger in for the extension.)  The back garden in a muddy mess, but the trees and trunks are gone!


Also, the garage is gone.  The asbestos roof was the first to go, then the walls and finally the foundation.  It has been tons and tons of rubble.


The garage had some serious levels of cement and brick.  But no more.


The garden looked like this at 9 AM.


And this by 1 PM!

We've started the groundworks in the middle of winter.  And a Scottish winter at that, with all the glorious rain!  If the build were done in normal/less-wet conditions, it would likely take eight weeks.  But since we're super clever and started the work in the middle of the cold and wet, we're hoping to be done in five months!  We got a pretty good price for starting the work now, and it's not like we'd be using the back garden much in the winter anyway.

Just in case you like videos, here's a little update:


Friday, August 21, 2015

Phase III: Side Extension

When we bought our house, I had grand plans for how it would be.  Grander plans than the budget would allow.  So Niall and I sat down and worked out a plan:

Phase I:  Get the house habitable (immediate)
Phase II:  Loft Conversion  (one year later)
Phase III:  Side Extension  (two-three years later)

Phase I and II are done, and we've been working on Phase III since February.  Well, I guess actually before that since we got planning approval in 2013.  But in February we talked with the architect and structural engineer and it took five months to get the warrant application submitted.  For a side extension, off the kitchen.  Which we don't technically need (come on, the house is already a nice size) but I still want.  Greedy?


We're waiting on Building control, builder and the bank to get started.  Maybe we'll rip down the garage and go forward with the extension next month?  But only if the stars align.

Also, I did tell Niall I wanted the extension so much that I would dig the foundations myself.  But guess what?  I dug a trial hole for the structural engineers and it was hard.  Really hard.


So, uh, the budget will include someone else (preferably a machine) doing the digging.

Thursday, June 25, 2015

Stairs (AKA the endless pit of time)

When we first viewed the house, one of the things I loved was how wide the stairs were.  And since there was only a runner, we could see the stairs had a decent bull nose and were in good shape.


When the carpet was removed, we could see some history of the house's decorating history.  (Note:  Finial added on the banister.)


It would have been easier (and when all was said and done, less expensive) to carpet the stairs.  But why do things the easy way?  First, I got a heat gun an stripped the paint.   (What I didn't check is if the paint was lead.  In hindsight, I'm pretty sure it was.)  And then I sanded.  And then I had some other guys sand.


And then I sanded some more, even with this little mouse sander.  But the stairs still didn't look right.


And then we ended up hiring professional sanders to do the treads.  And a few weeks or months after we moved in we painted the risers.


Varnish and paint, and the stairs looked pretty good.


Niall probably secretly loves pinterst because he had me add numbers to the stairs.  


Should we just pretend this it the after?

The truth is... we converted the loft.  And the wear and tear of the house conversion settled into the stairs.  Knocking a hole in the roof (plus all the other things we've done to this house) left the stringer and the wall with a crack.  Plus we had to put in a railing for Building Control and then took it out.  I spent ages making the wall good and clearing the gap, filling it, sanding, caulking and painting.  Only to see this a few weeks later.


Ugh.  I'm so slow these days.  It took me about a week to put in a sliver of quarter round (not very well installed), caulk, sand, paint and then oil the stairs.  Sometimes I feel like the more time I put into these stairs, the more that will be required.  They're back to looking like this, I just need to add the numbers?


Saturday, June 20, 2015

Old Wooden Chest

Life around these parts is a lot less DIY these days.  But one day in the winter we went to a charity shop.  Niall saw this chest and was taken.   He said he has wanted one of these for a long time.  Alas, despite the sign, it was more than 50p.  It was more like £75.

The chest had a faux oak finish that probably looked really good a few years ago.  But it had gone a bit orange and had scratched off in places.


Cue hours and hours of the paint gun, eco stripped (seriously, should have just used the good stuff) and sanding.


It was a messy, labor intensive project.  And we didn't take a lot of photos.  But so much paint stripping.  And it was probably lead paint, now that I think about it.


The chest had about four layers of paint and a black stain.  I stripped and stripped, went through so much steel wool.

And then finally called it a day and oiled 'er up.


The chest now has pride of place in the living room and serves as a stage when the girls want to perform.


Sunday, January 4, 2015

Garden Design Ramblings

Our house was built in 1926, and the garden has 'evolved' over the past 89 years.  A lot of the features  (the pavers, the planting beds, the walls, outbuildings, the overall layout) have seen wear and could use a facelift.  Since moving in, we've been trying to work with what we have for a temporary solution.  Over the next few years, we're planning to make a bigger change, and are working with a landscape designer to help with the process.

We have a few things to consider:
Steep driveway
Concrete bomb shelter (air raids shelter) we'd like to keep
Kids 
Maintenance

We've been gathering ideas since we bought the house.  On New Year's Day, I walked around the neighbourhood with Niall's mom to discuss options and take pictures.

1.  Summerhouse:  Niall wants one, by the bomb shelter.  He likes this one (sans garbage can) around the corner from us.  I'm hoping for some direction on how to incorporate Niall's summerhouse vision with the bomb shelter and a place to store things if we rip down the garage.  (For a side extension.)


2.  Usable, flat(ish) garden with paving and an out building.  Our garden has a slight change in elevation, but not enough to cause a problem.   We'd like the back yard to be somewhere the we can spend time as a family, but keep it fairly low maintenance and keep things cohesive. I like the clean lines of this garden.  When I walk by, I notice it and things it looks nice.


3.  Steps up to the house:  We're looking for a new set-up for the entrance to our house.  Right now it's steps along the driveway which isn't very welcoming and makes the driveway a tight squeeze.


We're looking to introduce steps in line with our front door.  Something kind of like this:


One neighbour has done this:


Another has built a retaining wall to level their steep driveway.


Another has steps leading from the driveway to the front door (instead of along the driveway)


And another has their steps along the drive but almost in line with the front door.  (Making the driveway wider and the front garden a little smaller.)


This house doesn't have the pitch in the front garden that we do, but they have a walkway straight from the pavement to their front door.


Walkway from pavement to front door.  (But with entrance on the side of the house.)


I like the low profile front wall, where the top of the wall is almost level with the ground behind it.  (Our current front retaining wall is about a foot higher the the ground.)


Niall likes a low profile, but wants to add a metal railing on top.


In time, we're planning to add a side extension.  But our driveway is steeper.  (I do like how this extension looks.)


Another pitched drive, with a retaining wall for the garden.


One other thing we both like is the idea of adding a pergola (possibly with glass inserts to help with the rain) possibly in the back garden.  Down the road someone has a metal and glass carport, a design along these lines may work.  

We'll see.  For now I'm remind myself how far we've come from when we saw the house two years ago.